Handling authentication and authorization with JWT in SvelteKit
Resources
Svelte version: 3.58.0
SvelteKit version: 1.15.5
GitHub repository: https://github.com/JustinyAhin/sveltekit-auth-jwt
SvelteKit is a meta-framework on top of Svelte for building web applications. It comes with a handful of features that make it delightful to work with. Things like load functions, API routes, server functions, form actions, and progressive enhancement provide a full-fledged experience for end-to-end web application development.
I have been using SvelteKit for quite some time now, and at some point, I’ve struggled with finding a consistent way to handle all the authentication and authorization flow. Because I’ve not implemented such a thing in a JavaScript context before.
After a handful of trials and reading various repositories codes and tutorials, I’ve come up with an implementation that seems satisfying for me and that I’m going to share in this article.
How does SvelteKit handle server-side code?
In SvelteKit, you have two main ways to run server-side code: API routes (or endpoints, as they are officially called in the documentation) and server functions. Server functions are created in +page.server.ts or +layout.server.ts files or their JS equivalents.
Endpoints are JavaScript or TypeScript files that export regular HTTP methods. They take a request event as a parameter and return a Response object.
Server functions can either be load functions or form actions. load functions run both during server-side and client-side rendering, while form actions are triggered as a result of form submission.
This tutorial’ll create a small project with a sign-up, login, and guarded pages. Our authentication and authorization login is going to be implemented in our routes' server-side code, and we will use SvelteKit hooks to authorize users in the guarded routes.
We will use JSON Web Tokens (JWT) to generate and verify encrypted tokens that will be sent along with all authenticated requests. We will also use an SQLite database as our store and Prisma to interact with it.
Creating the project
The final code for this tutorial is available on my GitHub here.
It’s pretty straightforward to create a SvelteKit project by running the following command:
pnpm create svelte@latest sveltekit-auth-jwtI’m using the skeleton template with TypeScript, Prettier, and ESLint enabled.
Installing necessary dependencies
We will need a few dependencies that will be used along the way. First, we install prisma as a development dependency:
pnpm install prismaNow we will install bcryptjs to hash and compare passwords, jwt to generate and verify tokens, and @prisma/client to interact with our database:
pnpm install bcryptjs jsonwebtoken @prisma/clientWhen using TypeScript, some dependencies require type definitions. We install them with the following command:
pnpm install -D @types/bcryptjs @types/jsonwebtokenSetting up the database
Let’s now use Prisma to initialize an SQLite database and create a User model.
pnpx prisma init --datasource-provider sqliteIn our schema.prisma file, we will create a simple User model with email and password fields.
model User {
  id        String   @id @default(cuid())
  createdAt DateTime @default(now())
  updatedAt DateTime @updatedAt
  email     String   @unique
  password  String
}
We can generate the Prisma client and apply our schema changes to the database by running
pnpx prisma db push
pnpx prisma generate
How does JWT work?
JWT is basically a standard to securely transmit information between parties (in our case, a client and a server) as a JSON object. This information can be verified and trusted because it is digitally signed using a secret or a public/private key pair.
In an authentication-authorization flow, after a user successfully logs in, the server generates a JWT that contains some user information and sends it back to the client. The client then stores this token in a cookie or local storage and sends it along with every request to the server, which can then verify the token and grant access to protected resources/information.
Here is a simple diagram of how JWT works:

Authentication pages for our app
Now that we understand how JWT works let’s create our authentication pages.
Sign up
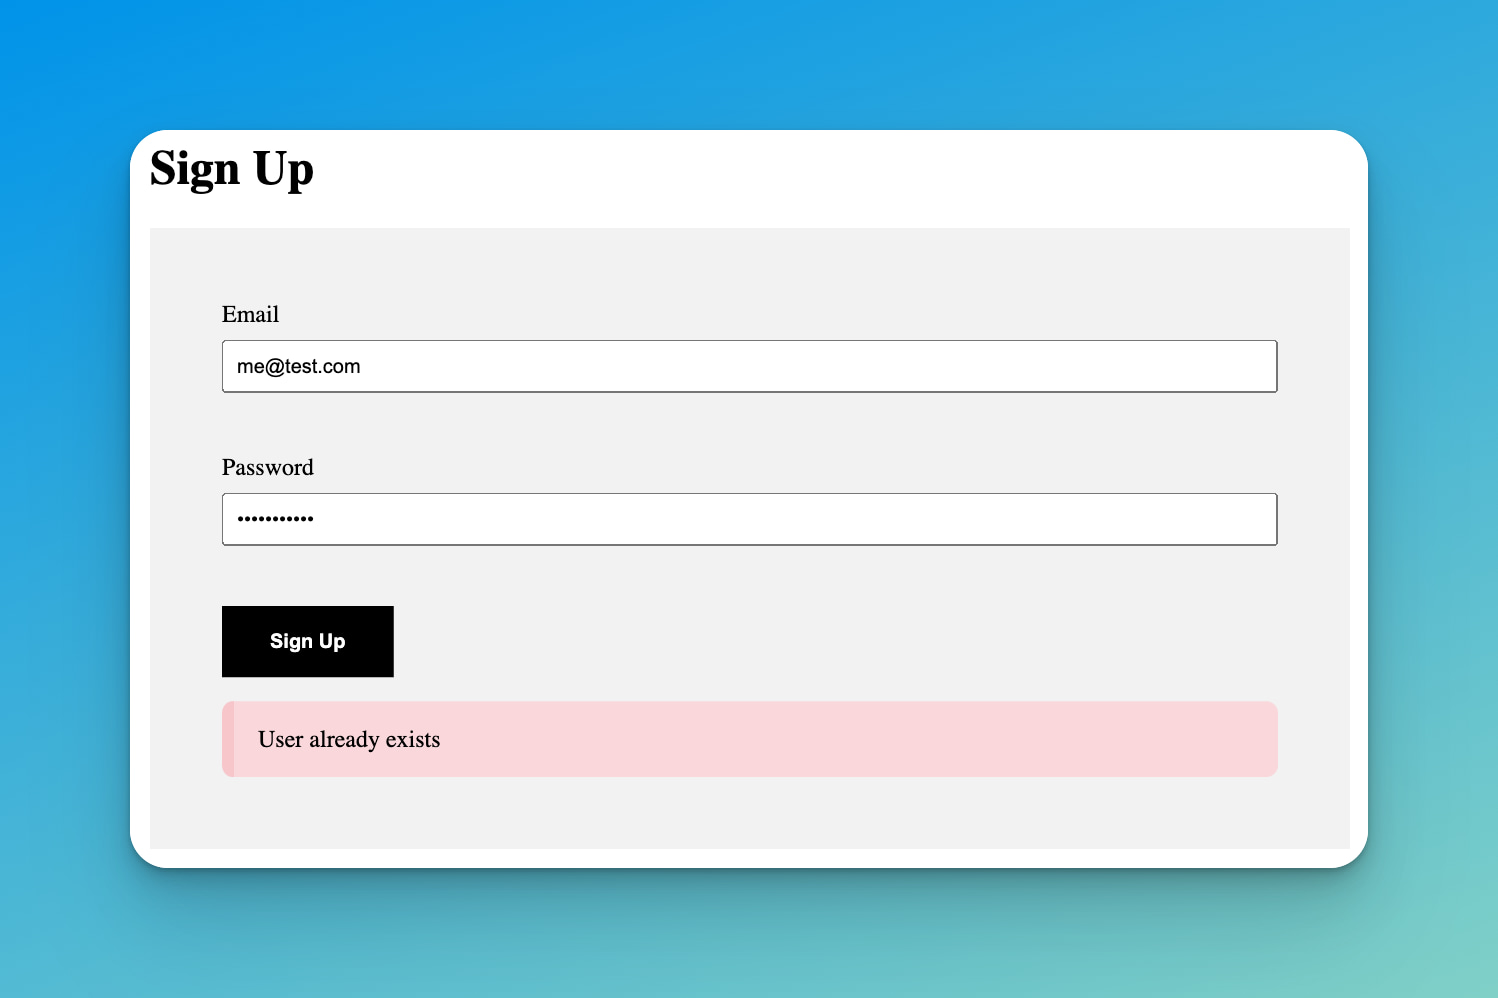
The signup page HTML markup is pretty straightforward. It’s simply a form with an email, password input, and a submit button.
<section>
  <form method="post">
    <div class="group">
      <label for="email">Email</label>
      <input type="email" name="email" id="email" required />
    </div>

    <div class="group">
      <label for="password">Password</label>
      <input type="password" name="password" id="password" required />
    </div>

    <div class="submit-container">
      <button type="submit">Login</button>
    </div>
  </form>

  <div class="actions">
    <a href="/signup">Sign Up</a>
  </div>
</section>
Here, we add method="post" to our form for posting signup data. But how are we going to handle that?
This is where SvelteKit form actions come in handy. In a +page.server.ts file, we can export some actions, allowing us to post data through a form. Here is what it looks like:
import type { Actions } from './$types';
import { fail, redirect } from '@sveltejs/kit';
import { createUser } from '$lib/user.model';

export const actions: Actions = {
  default: async (event) => {
    const formData = Object.fromEntries(await event.request.formData());

    // Verify that we have an email and a password
    if (!formData.email || !formData.password) {
      return fail(400, {
        error: 'Missing email or password'
      });
    }

    const { email, password } = formData as { email: string; password: string };

    // Create a new user
    const { error } = await createUser(email, password);

    // If there was an error, return an invalid response
    if (error) {
      return fail(500, {
        error
      });
    }

    // Redirect to the login page
    throw redirect(302, '/login');
  }
};
The default action for a form is called default. We could also use named actions in case we have many actions on a page.
What we are doing here is validating the data we get from the form, creating a new user, returning a validation error in case there's an error, and finally, redirecting to the login page if everything is successful.
The code for creating a user can be found here.
In the current state, the signup form works without client-side JavaScript. SvelteKit makes the experience smoother with progressive enhancement. We do that by adding the use:enhance action to our form element.
With that added, the form will be submitted with client-side JavaScript, making it a better user experience.
<script lang="ts">
  import { enhance } from '$app/forms';
</script>

<form method="post" use:enhance></form>
Let's also add a few things to make the experience even better. We can display the validation error we returned in our server code on the frontend.
When we return something from a form action, it comes to the frontend as ActionData . We will use that to conditionally errors messages like this:
<script lang="ts">
  import type { ActionData } from './$types';

  export let form: ActionData;
</script>

<form method="post" use:enhance>
  {#if form?.error}
    <div class="notice error">
      {form.error}
    </div>
  {/if}
</form>Now, we can have this alert when there is an error:
Login
The process for logging in is a bit similar to signing in. We use a form action to authenticate our user and redirect to the guarded page. The main difference resides in setting up the JWT token as a cookie.
Let's see how it goes:
<script lang="ts">
  import type { ActionData } from './$types';
  import { enhance } from '$app/forms';

  export let form: ActionData;
</script>

<svelte:head>
  <title>Login</title>
</svelte:head>

<h1>Login</h1>

<section>
  <form method="post" use:enhance>
    <div class="group">
      <label for="email">Email</label>
      <input type="email" name="email" id="email" required />
    </div>

    <div class="group">
      <label for="password">Password</label>
      <input type="password" name="password" id="password" required />
    </div>

    <div class="submit-container">
      <button type="submit">Login</button>
    </div>

    {#if form?.error}
      <div class="notice error">
        {form.error}
      </div>
    {/if}
  </form>

  <div class="actions">
    <a href="/signup">Sign Up</a>
  </div>
</section>
Now on the server side:
import type { PageServerLoad, Actions } from './$types';
import { redirect, fail } from '@sveltejs/kit';
import { loginUser } from '$lib/user.model';

export const load: PageServerLoad = (event) => {
  const user = event.locals.user;

  if (user) {
    throw redirect(302, '/guarded');
  }
};

export const actions: Actions = {
  default: async (event) => {
    const formData = Object.fromEntries(await event.request.formData());

    if (!formData.email || !formData.password) {
      return fail(400, {
        error: 'Missing email or password'
      });
    }

    const { email, password } = formData as { email: string; password: string };

    const { error, token } = await loginUser(email, password);

    if (error) {
      return fail(401, {
        error
      });
    }

    // Set the cookie
    event.cookies.set('AuthorizationToken', `Bearer ${token}`, {
      httpOnly: true,
      path: '/',
      secure: true,
      sameSite: 'strict',
      maxAge: 60 * 60 * 24 // 1 day
    });

    throw redirect(302, '/guarded');
  }
};
We set the AuthorizationToken cookie with the JWT token and return a successful response.
Note here a few things:
The
httpOnlyoption is set totrueto prevent the cookie from being accessed by JavaScript. This is a good practice to prevent XSS attacks.We set the
secureoption totrueto ensure that the cookie is only sent over HTTPS.The
sameSiteoption is set tostrictto prevent the cookie from being sent in cross-site requests.
You can read the MDN documentation for more information about the Set-Cookie header.
With SvelteKit, there is no need to use third-party cookies packages because the framework handles this natively.
We are also exporting a load function in this file. We're basically redirecting to the guarded page if the user is already logged in. You'll understand more about how this part is handled in the hook section.
You can give a look at the loginUser() helper here.
Implementing authorization hook
If you come from a framework like Express, you might be familiar with the concept of middleware. In SvelteKit, we have something called hooks. These are functions that are called before a request is handled by a route.
Hooks can be defined on the server side or on the client side, or both if necessary. We will define our hooks on the server side for this tutorial, since we are doing authentication logic.
The most used hook is the handle hook, which simply takes a request and returns a response.
Per convention, server hooks are defined in a /src/hooks.server.js or /src/hooks.server.ts file.
// /src/hooks.server.ts
export const handle: Handle = async ({ event, resolve }) => {
  const { headers } = event.request;
  const cookies = parse(headers.get("cookie") ?? "");

  if (cookies.AuthorizationToken) {
    // Remove Bearer prefix
    const token = cookies.AuthorizationToken.split(" ")[1];

    try {
      const jwtUser = jwt.verify(token, import.meta.env.VITE_JWT_ACCESS_SECRET);
      if (typeof jwtUser === "string") {
        throw new Error("Something went wrong");
      }

      const user = await db.user.findUnique({
        where: {
          id: jwtUser.id,
        },
      });

      if (!user) {
        throw new Error("User not found");
      }

      const sessionUser: SessionUser = {
        id: user.id,
        email: user.email,
      };

      event.locals.user = sessionUser;
    } catch (error) {
      console.error(error);
    }
  }

  return await resolve(event);
};
Here are the things that are happening in the handle hook:
We check if there is an
AuthorizationTokencookie.In case there is one, we extract the JWT token from it.
We verify the token using the
jwt.verifyfunction.If there is any error, we simply throw it and return the response from the route.
If the token is valid, we get the user from the database and save it in the
event.localsobject.
With that in place, for every request that comes to our application, we either save or not the user ID in the locals . This gives us enough flexibility to handle authorization and necessary redirects per route.
Protecting guarded routes
For our protected routes, we will make use of SvelteKit load function. Since it runs before the component is rendered, we can use it to get the logged-in user from the locals, and either display the component or redirect the user to the login page.
Our load function will be implemented in our guarded route's +page.server.ts file.
<!-- /src/routes/guarded.svelte -->
<script lang="ts" context="module">
  import type { Load } from '@sveltejs/kit';
  import type { SessionUser } from 'src/hooks';

  export const load: Load = ({ session }) => {
    const user = session.user;

    if (!user) {
      return {
        status: 302,
        message: 'You must be logged in to view this page',
        redirect: '/login'
      };
    }

    return {
      props: {
        user: session.user
      }
    };
  };
</script>

<script lang="ts">
  export let user: SessionUser;
</script>

<svelte:head>
  <title>Guarded page</title>
</svelte:head>

<h1>Guarded page</h1>
<p>This page is guarded and will only be accessible to authenticated users.</p>

<p>Hello {user.email}</p>
When there is no user in the locals, we throw a 401 error; else we return the user to be used on the frontend.
In case there is an error, we will then have this when trying to access the guarded route:

This is a custom error page that was generated from this error template. You can read more about custom error pages in Svelte here.
Wrapping up
This tutorial just shows one of the many ways to implement authentication and authorization in Svelte. There are many other aspects that I haven’t covered here. Things like implementing refreshing the token when it expires, implementing a logout or password reset endpoints. I’ve also used a very basic validation system, both on the client and on the server.
I’ll write more about these in future articles.
FAQ
JSON Web Token (JWT) is a standard that allows you to securely transmit data between parties as a JSON object. This data can be verified because it is digitally signed using a secret or a public/private key pair.
JWTs are used in authentication protocols to create access tokens that assert some number of claims. When a user successfully logs in, a JWT is generated by the server and sent to the client, which then includes it in future requests to verify the user's identity.
In SvelteKit, server-side code can be handled primarily through two mechanisms: API routes and server functions. API routes, also known as endpoints, are JavaScript or TypeScript files that export HTTP methods.
Server functions can be either load functions, which run both during server-side and client-side rendering, or form actions that are triggered by form submissions.
The httpOnly option is set to true to prevent the cookie from being accessed by JavaScript.
This is a security best practice to prevent Cross-Site Scripting (XSS) attacks. With this option enabled, the cookie can only be modified by the server, which significantly reduces the risk of the client-side script accessing the secure cookie.
The handle hook in SvelteKit is similar to middleware in other frameworks like Express. It's a function that runs before a request is handled by a route. This hook can be used to modify the request or response or to perform actions based on the request.
In the context of JWT authentication, it can be used to verify the token and authenticate the user before the request reaches the route.
Read this blog post to learn more about handle hooks in SvelteKit: SvelteKit Internals: the handle hook
event.locals is a property of the event object in SvelteKit server-side functions. It's an object where you can store data that should be available to all downstream functions and endpoints during the lifecycle of a request.
In this tutorial, it's used to store the authenticated user's information.
The secure option, when set to true, ensures that the cookie will only be sent over HTTPS. This is a security best practice that helps to prevent the cookie from being exposed to eavesdropping.
The sameSite option set to strict prevents the cookie from being sent in cross-site requests. This helps to protect against Cross-Site Request Forgery (CSRF) attacks by ensuring the cookie is only sent if the request originated from the same site that set the cookie.
If JWT verification fails in the handle hook, an error will be thrown. This could be due to the token being invalid or expired. In such a case, the user would not be authenticated and the request would be handled as an unauthenticated request.
The passwords are stored in the database as hashed strings. This means that the original password is transformed into a unique string of characters using a hashing algorithm.
Hashing is a one-way process, making it nearly impossible to derive the original password from the hashed string. This enhances the security of user data.
Errors are handled by returning appropriate error messages from the server to the client. These messages are then displayed to the user. It's important to handle errors carefully to prevent leaking sensitive information.